
Over the past few years the developers of Star Wars: The Old Republic have simplified gearing for lower-level players who are still progressing through the game.
Starting at Level 1, as you progress through the story and other quests, you receive armour and other gear pieces that suit your combat style and level. There’s no need to min-max gear as you level; the gear provided will see you through to Level 80 without issue.
That all changes when you hit Level 80. End game gearing is a little bit unintuitive as there are multiple steps required to reach the highest levels of gear.
This guide will explain the process of end game gearing and set out an easy-to-follow path you can follow as soon as you hit Level 80.
Before you begin
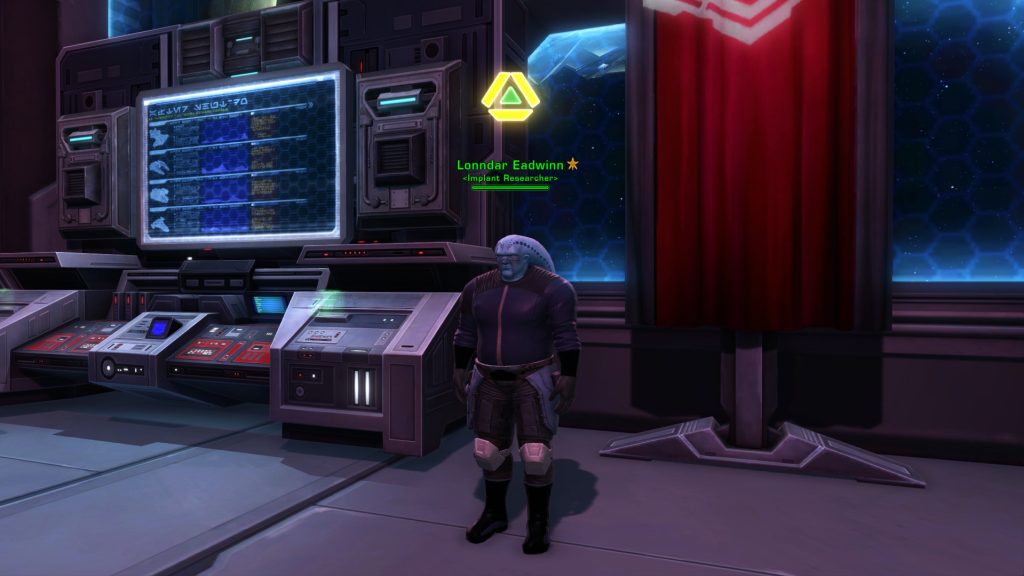
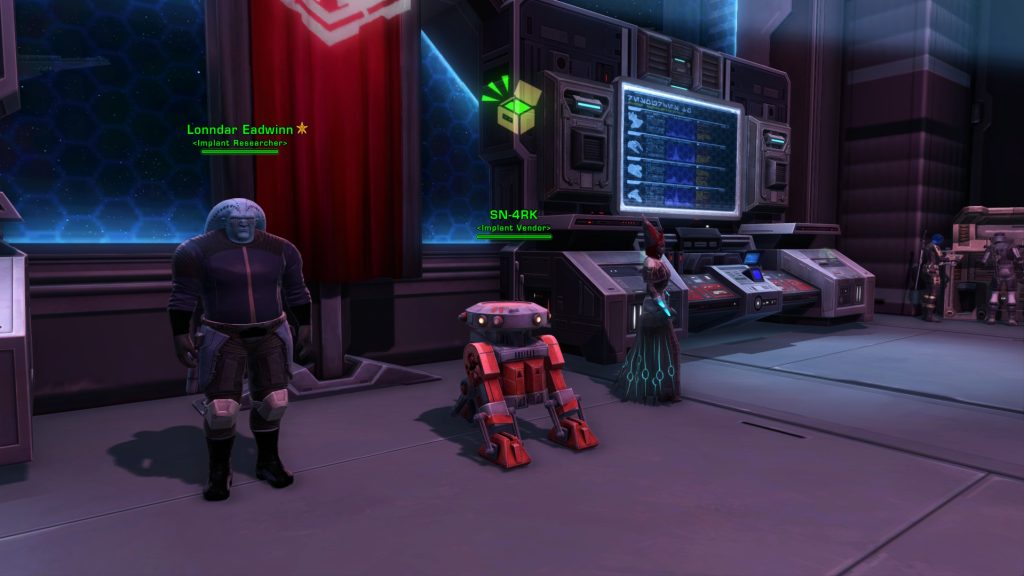
Before anything else, head to the Supplies section of the fleet and look for an NPC named Lonndar Eadwinn, the Implant Researcher.
Accept his quest (Technological Advancements) and follow the instructions until you get the objective “Charge the Neuro-Key by Completing Activities: 0/100”.
Keep the quest, but forget about it for now; this will make sense later!
Step 1: Decurion (Flashpoints)
You can view end-game gearing as a “ladder” with multiple rungs to climb. Decurion is the first rung and is essentially a “starter pack” to enable you to play harder content (flashpoints, operations) later. View it as more of a “stepping stone” that you step through to enable you to get to the later stages.
Decurion items comes in two rarities; green (Elite Decurion) and blue (Supreme Decurion). You can ignore the blue gear at this stage as the aim is to climb out of this tier of gear as quickly as possible.
You can earn Elite Decurion gear in two main ways:
- Earning entire gear pieces through boss drops and quest rewards (Upgrade Caches)
- Spending FP-1 Stabilisers, a unique currency that you receive for completing Flashpoints at Level 80
Your aim at this stage
Following the guide below, obtain a full set of Elite Decurion (green rarity) gear at item rating 324.
The full set includes:
- Main Hand Weapon (lightsaber or blaster, depending on your class)
- Offhand (lightsaber, focus, blaster, or shield generator, depending on your class)
- Full armour set (Head, Chest, Waist, Legs, Feet, Wrists, Hands)
- Ear (Device)
- 2 x Implants
- 2 x Relics
Remember: Don’t spend too much time thinking about stats at this stage. This is a temporary gear set that simply needs to be “good enough” to tide you over until the next stage.
Boss Drops/Upgrade Caches (Quest Rewards)
This is where the bulk of your initial gear will come from.
As you complete Flashpoints at Level 80, each boss will drop a random gear piece. There is a chance that the dropped item will be a higher level than the one you have equipped currently, but this isn’t guaranteed.
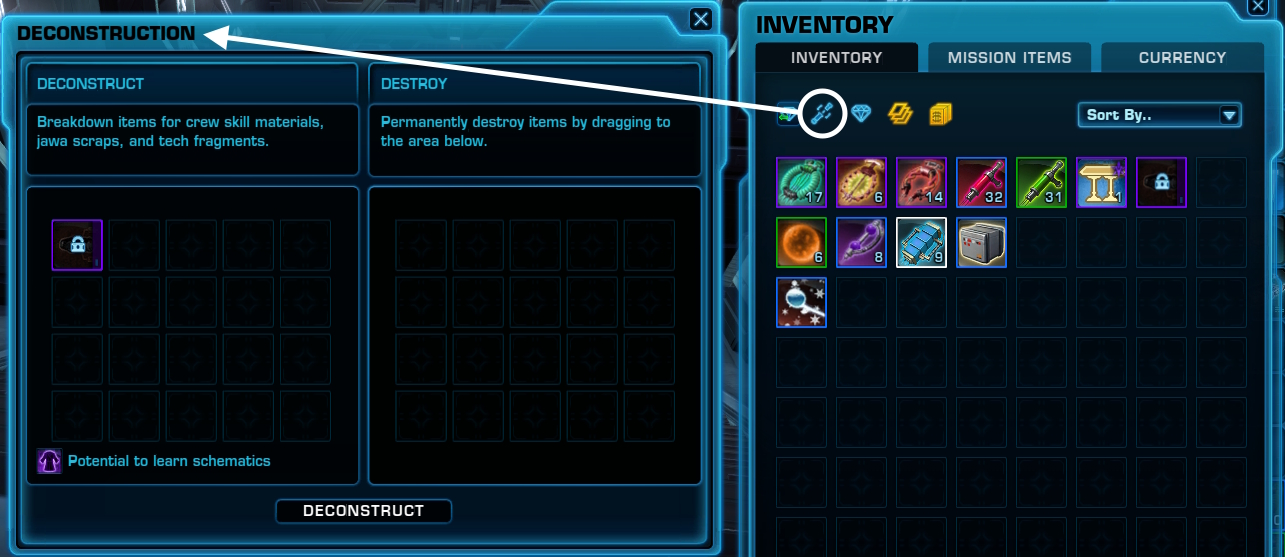
Important: Do not sell or destroy gear that you don’t need. Surplus gear can be deconstructed (“disenchanted”), providing FP-1 Stabilisers and other materials. We’ll cover this in the next section.
Additionally, you sometimes receive Upgrade Caches. This is a “reward chest”-type item that you receive for completing certain quests such as Weekly Group Finder bonuses (completing 3 random Flashpoints through the Group Finder).
Upgrade Caches are guaranteed to give you an item that is at least one item rating higher than your currently equipped gear. For example, if your lowest-rated item is an IR 326 helmet, you would receive an IR 328 helmet (item ratings go up in twos).
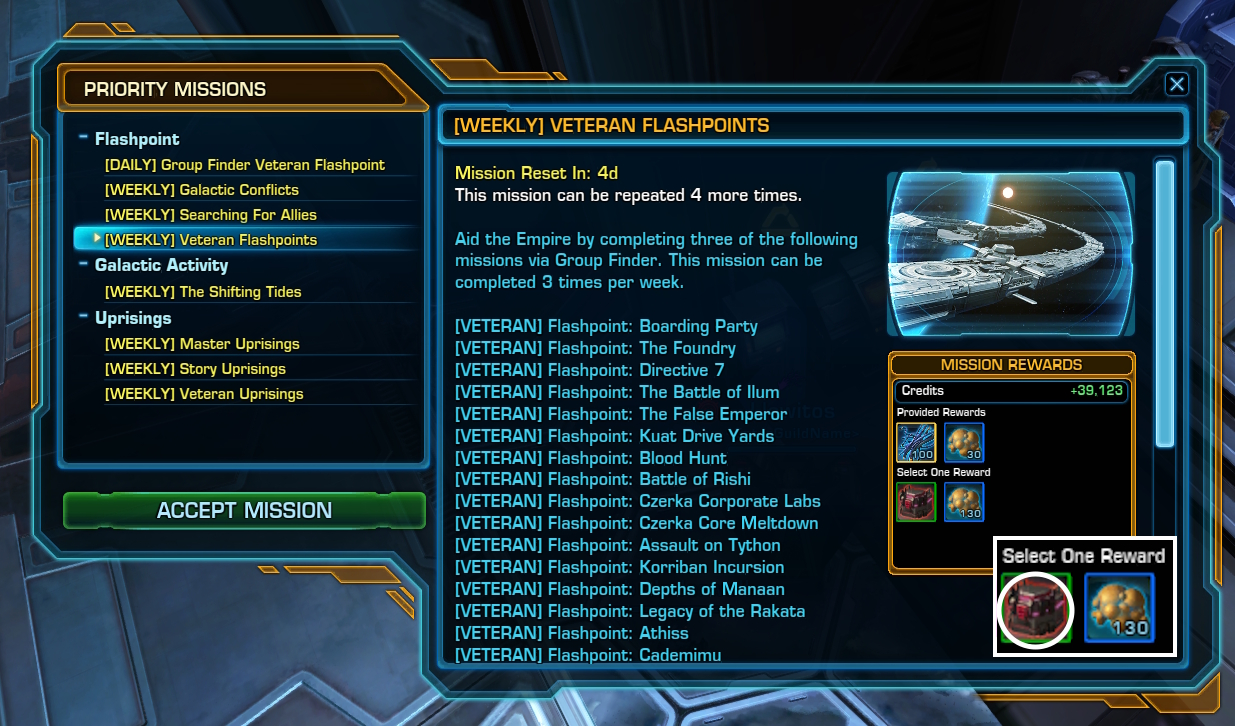
Important: When you complete a bonus quest (such as [WEEKLY] Veteran Flashpoints) you will receive the option to choose between an Upgrade Cache and a large number of FP-1 Stabilisers as a reward.
You should always take the Upgrade Cache for now, but this will change in later sections (Hyde & Zeek).
FP-1 Stabilisers
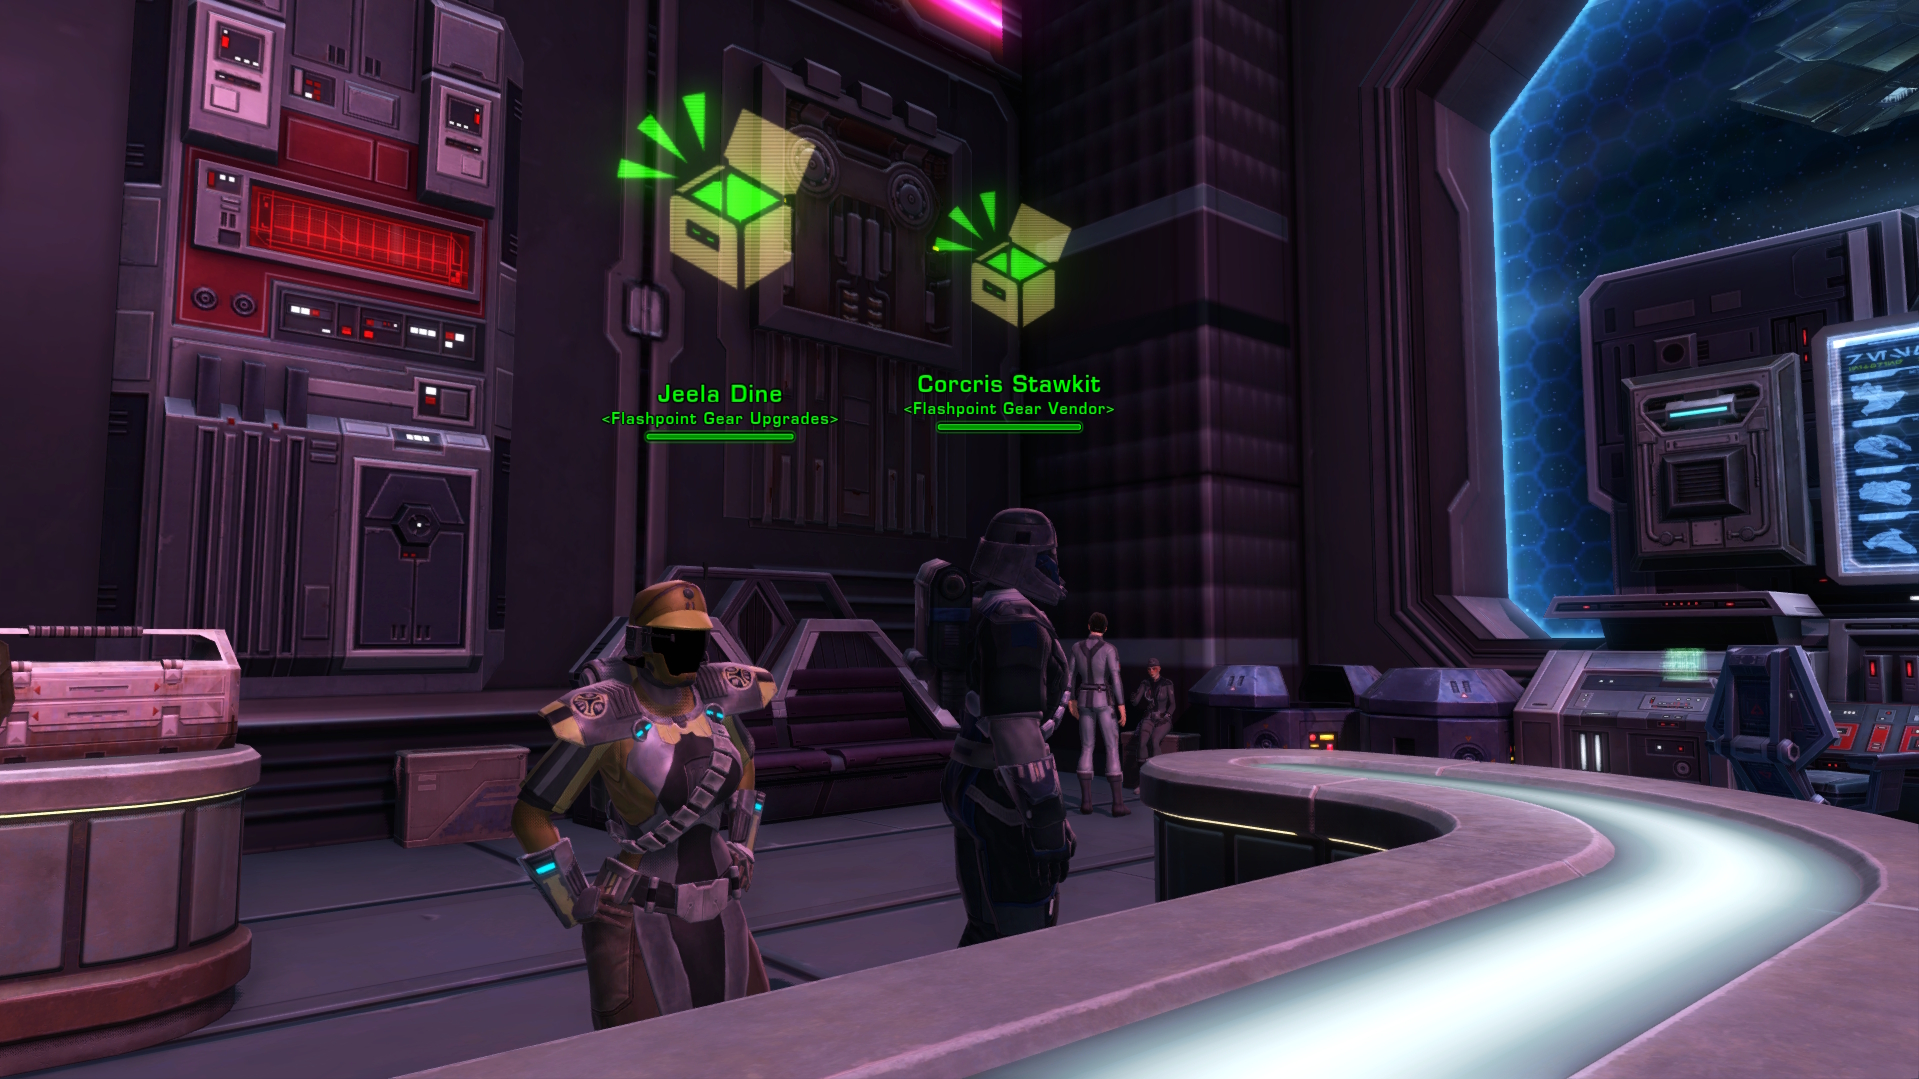
FP-1 Stabilisers are a unique currency that you receive for completing Flashpoints at Level 80. They can be used to buy or upgrade Elite Decurion gear from the Flashpoint Gear Vendors in the Supplies section of the Fleet.
Bosses will drop a small number of FP-1s after being defeated, and you will receive a moderate amount as a quest reward after completing the Flashpoint.
Surplus gear you don’t need can also be deconstructed (“disenchanted”), providing FP-1 Stabilisers and other materials.
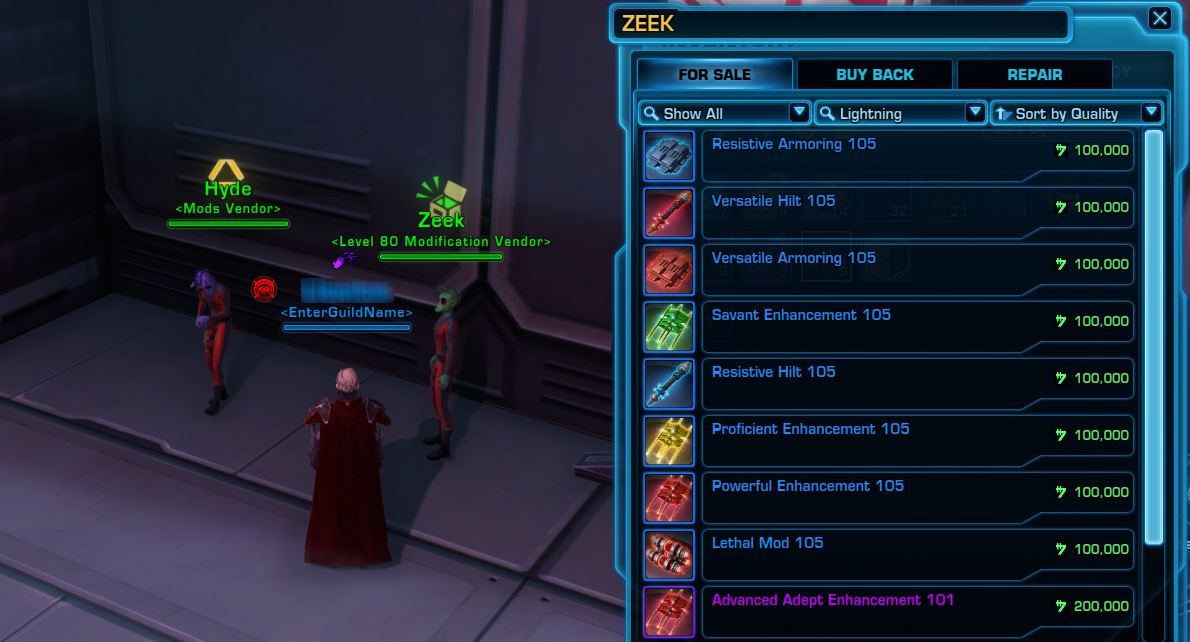
Step 2: Hyde & Zeek
Hyde & Zeek are essentially a fast-track method of obtaining a 340 Item Rating gear set. They sell item modifications that can be added to an adaptive gearset to bring it to 340 Item Rating. Note that you can only modify your main hand weapon (lightsaber or blaster depending on your class), offhand item (lightsaber, focus, blaster, or shield generator, depending on your class) and a full armour set; your earpiece, implants and relics will have to be upgraded separately (we’ll get into that later).
Your aim at this stage
Following the guide below, upgrade one piece of Prototype gear to Item Rating 340 and return it to Hyde.
Then, build a set of Item Rating 340 gear using mods from Zeek.
How Hyde & Zeek work
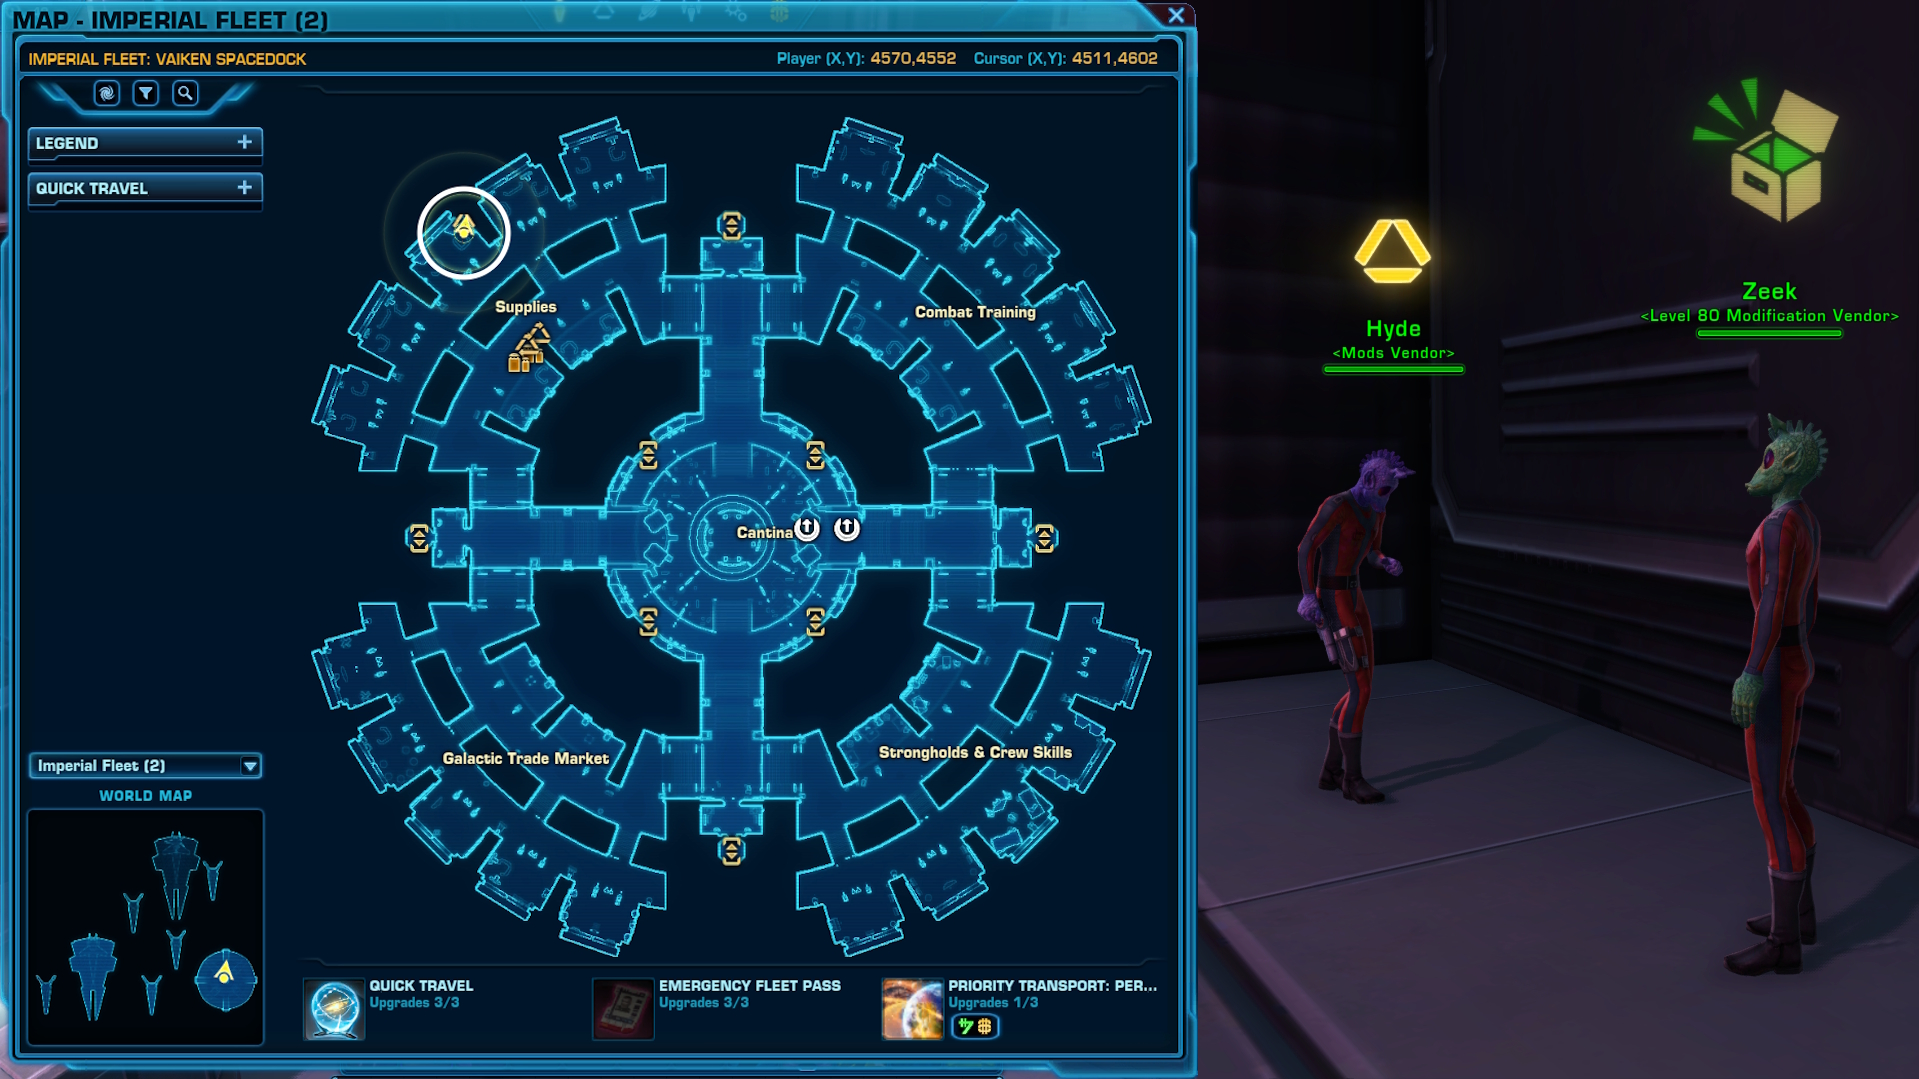
Hyde is the purple alien; he’ll give you a quest that will unlock access to Zeek, the green alien, who sells you the item modifications. Speak to Hyde and he’ll offer to make you special item modifications if you can bring him a piece of high-level gear to deconstruct.
You’ll eventually reach a dialogue where you have many options along the lines of “[Accept mission] I’ll return with the parts you need for…”
You want to accept the mission for 340 Prototype modifications.
All you need to do now is work on getting one piece of IR 340 Prototype (blue) gear and returning it to Hyde. And how do you do that?
Master Mode Flashpoints
We’re now into the second phase of grinding, where we will focus on obtaining one piece of IR 340 Prototype gear through playing Master Mode Flashpoints.
Master Mode Flashpoints are slightly harder than Veteran Mode Flashpoints, hence the need for the basic gear set we obtained earlier. You’ll also need a basic understanding of how to play your class, and some bosses have specific mechanics that you can’t just ignore.
If you’re not familiar with a specific flashpoint, just follow the lead of the other players you’re grouped with. If you get stuck there are many guides available to talk you through specific fights.
As before, each boss will drop a random gear piece, and you will also receive bonuses for completing quests.
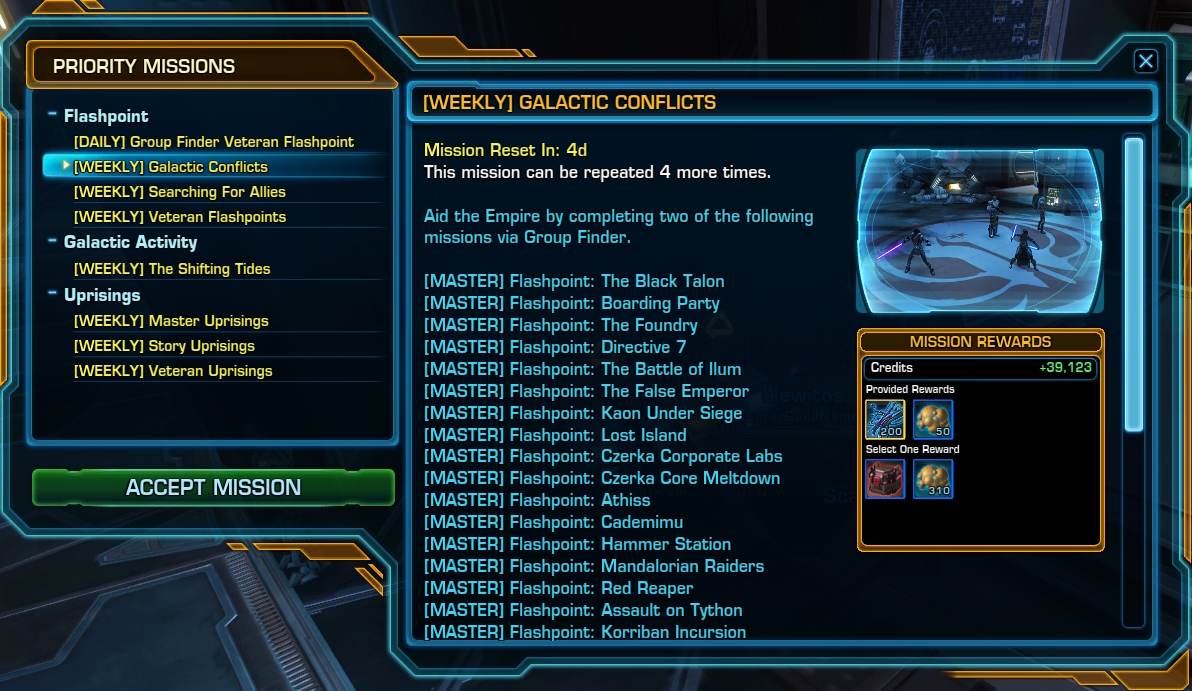
The weekly quest, [WEEKLY] Galactic Conflicts, provides a large number of FP-1 Stabilisers as a reward, and you only need to complete two Master Mode flashpoints as opposed to three Veteran Mode flashpoints to complete the weekly quest.
Important: Since we’re focusing on upgrading one item as quickly as possible, we now want to choose the currency reward (FP-1 Stabilisers) and not the Upgrade Cache. Since the Upgrade Cache drops a random item, it will take longer to upgrade one specific item to 340.
After completing your first Weekly quest, head to the Flashpoint Gear Vendor and purchase a Prototype (blue) earpiece; earpieces are cheaper to buy and upgrade compared to other gear pieces. As you grind FP-1 Stabilisers you can upgrade the earpiece all the way to Item Rating 340.
You can choose to equip any dropped items/rewards if they’re better than your current gear, but if you aren’t struggling with your current loadout, you can deconstruct all dropped items for extra FP-1 Stabilisers.
Once you’ve upgraded the earpiece all the way to Item Rating 340, you can take it back to Hyde; you’ll then have access to Zeek, who will sell you item modifications.
Building a gear set using mods from Zeek
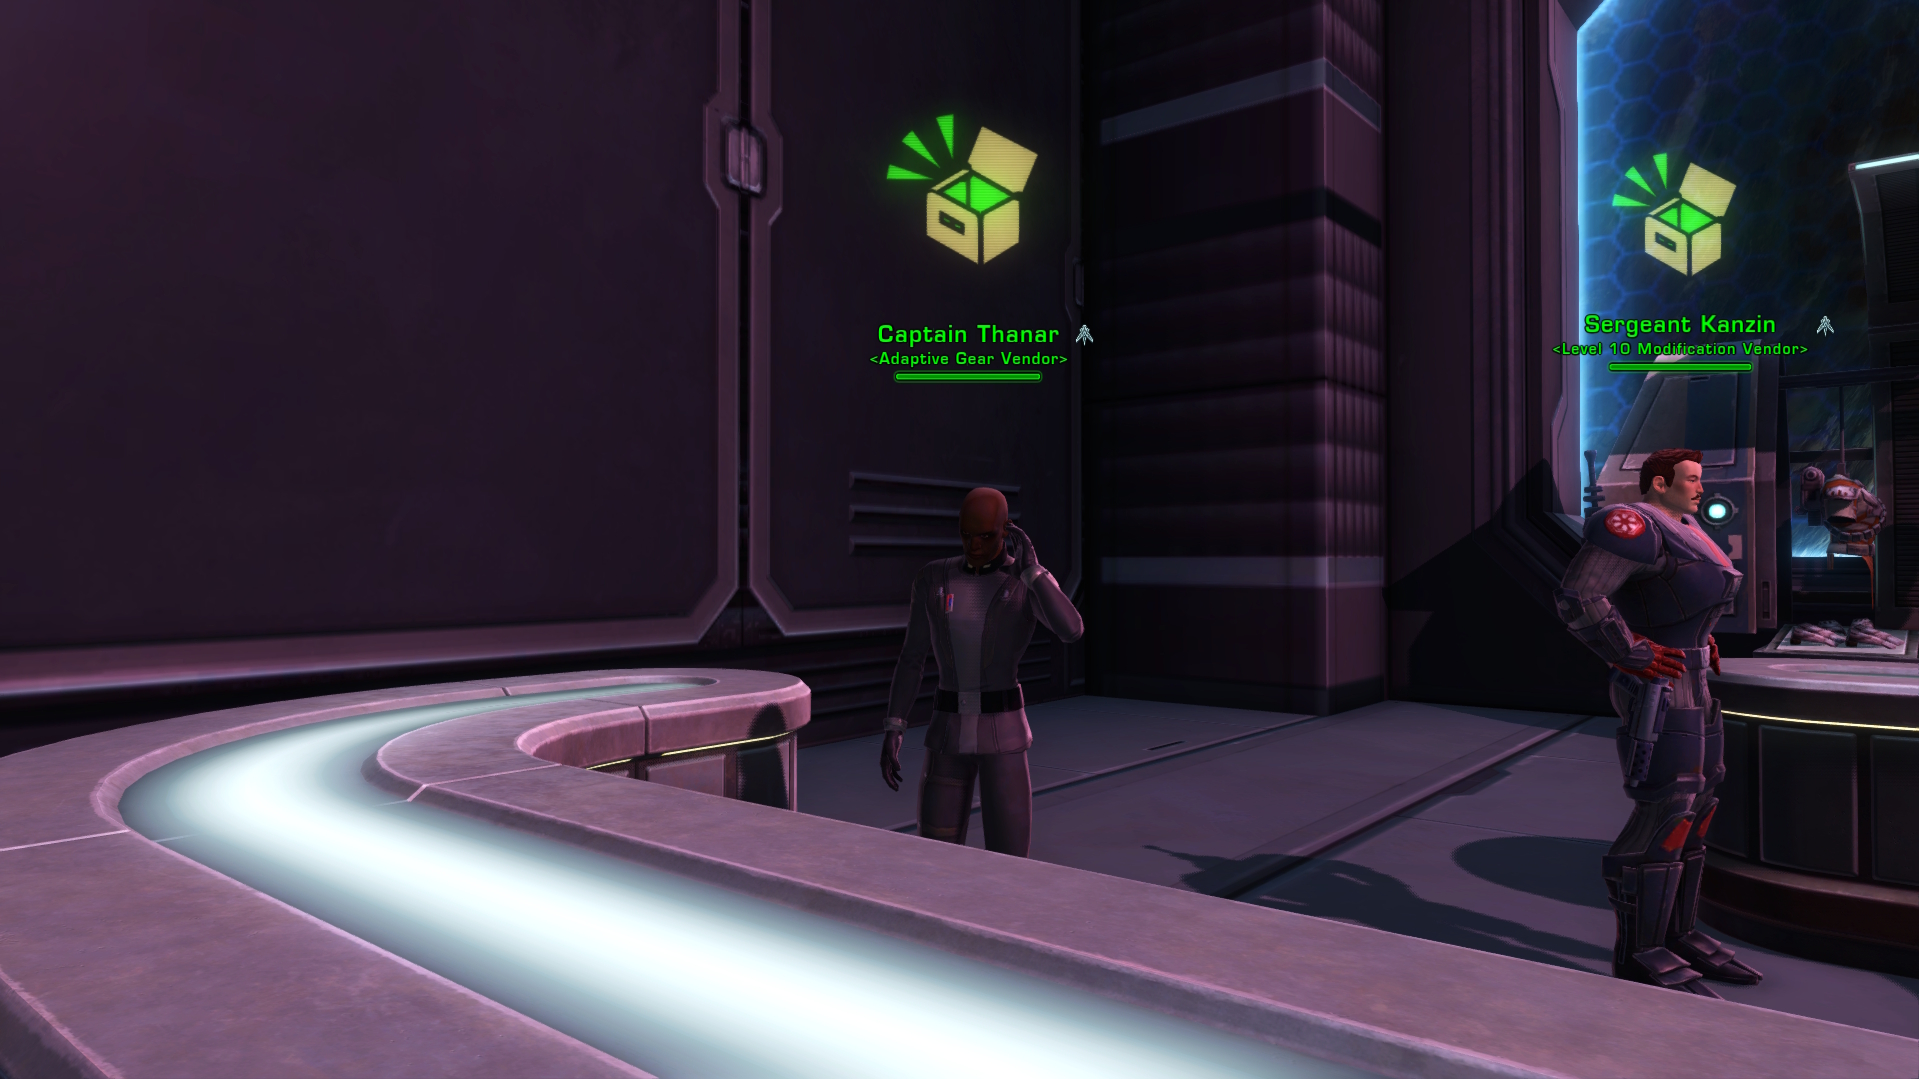
Head to the Adaptive Gear Vendor in the Supplies section of the Fleet and buy a full set of Adaptive Gear. The exact set doesn’t matter; the different sets are cosmetic only, and you won’t see the gear if you’re using a custom Outfit (transmog) anyway.
You’ll need:
- Main Hand Weapon (lightsaber or blaster, depending on your class)
- Offhand (lightsaber, focus, blaster, or shield generator, depending on your class)
- Full armour set (Head, Chest, Waist, Legs, Feet, Wrists, Hands)
As mentioned earlier, you can’t modify earpieces, implants, or relics, and we’ll have to upgrade those separately.
After buying a full armour set, head back to Zeek. Mods are purchased using credits and each mod costs 100,000 credits. Modifying the full set will cost around 2,400,000 (2.4 million) credits; if you’re short, have a look at our money making guide.
Each of the adaptive items will have slightly different modification slots, so check how many mods of each type (eg. Hilt/Barrel, Armouring, Mod, Enhancement) you need.
We now need to pay a little bit more attention to stats as the exact mods you want to buy will depend on your role (damage, heal, tank) and class (some classes have boosts to certain stats).
Rough guide to buying mods
- Hilt/Barrel:
- Damage Dealers and Healers: Versatile Hilt 105/Versatile Barrel 105 (red icon).
- Tanks: Resistive Hilt 105/Resistive Barrel 105 (blue icon).
- Armouring:
- Damage Dealers and Healers: Versatile Armouring 105 (red icon).
- Tanks: Resistive Armouring 105 (blue icon).
- Mods:
- Damage Dealers and Healers: Lethal Mod 105 (red icon).
- Tanks: Warding Mod 105B (blue icon).
- Enhancements:
- Provide tertiary stats (accuracy, alacrity, crit, shield, absorption). The exact amount will depend on the tertiary stats you need for your role/class; see this guide.
Quick note on other item modification slots:
- Weapon tunings are cosmetic only.
- Augments can be ignored at this stage.
- Colour crystals can be purchased on the Galactic Trade Network and provide a small boost to one stat. It’s a fairly negligible increase and can be ignored at this stage.
Step 3: Tactical & Legendary Implants
You should now have a full set of Item Rating 340 gear (with the exception of your earpiece, implants and relics).
Our next objective is to buy the appropriate Tactical and Legendary Implants for your combat style.
Your aim at this stage
Following the guide below, purchase the appropriate Tactical and Legendary Implants for your combat style.
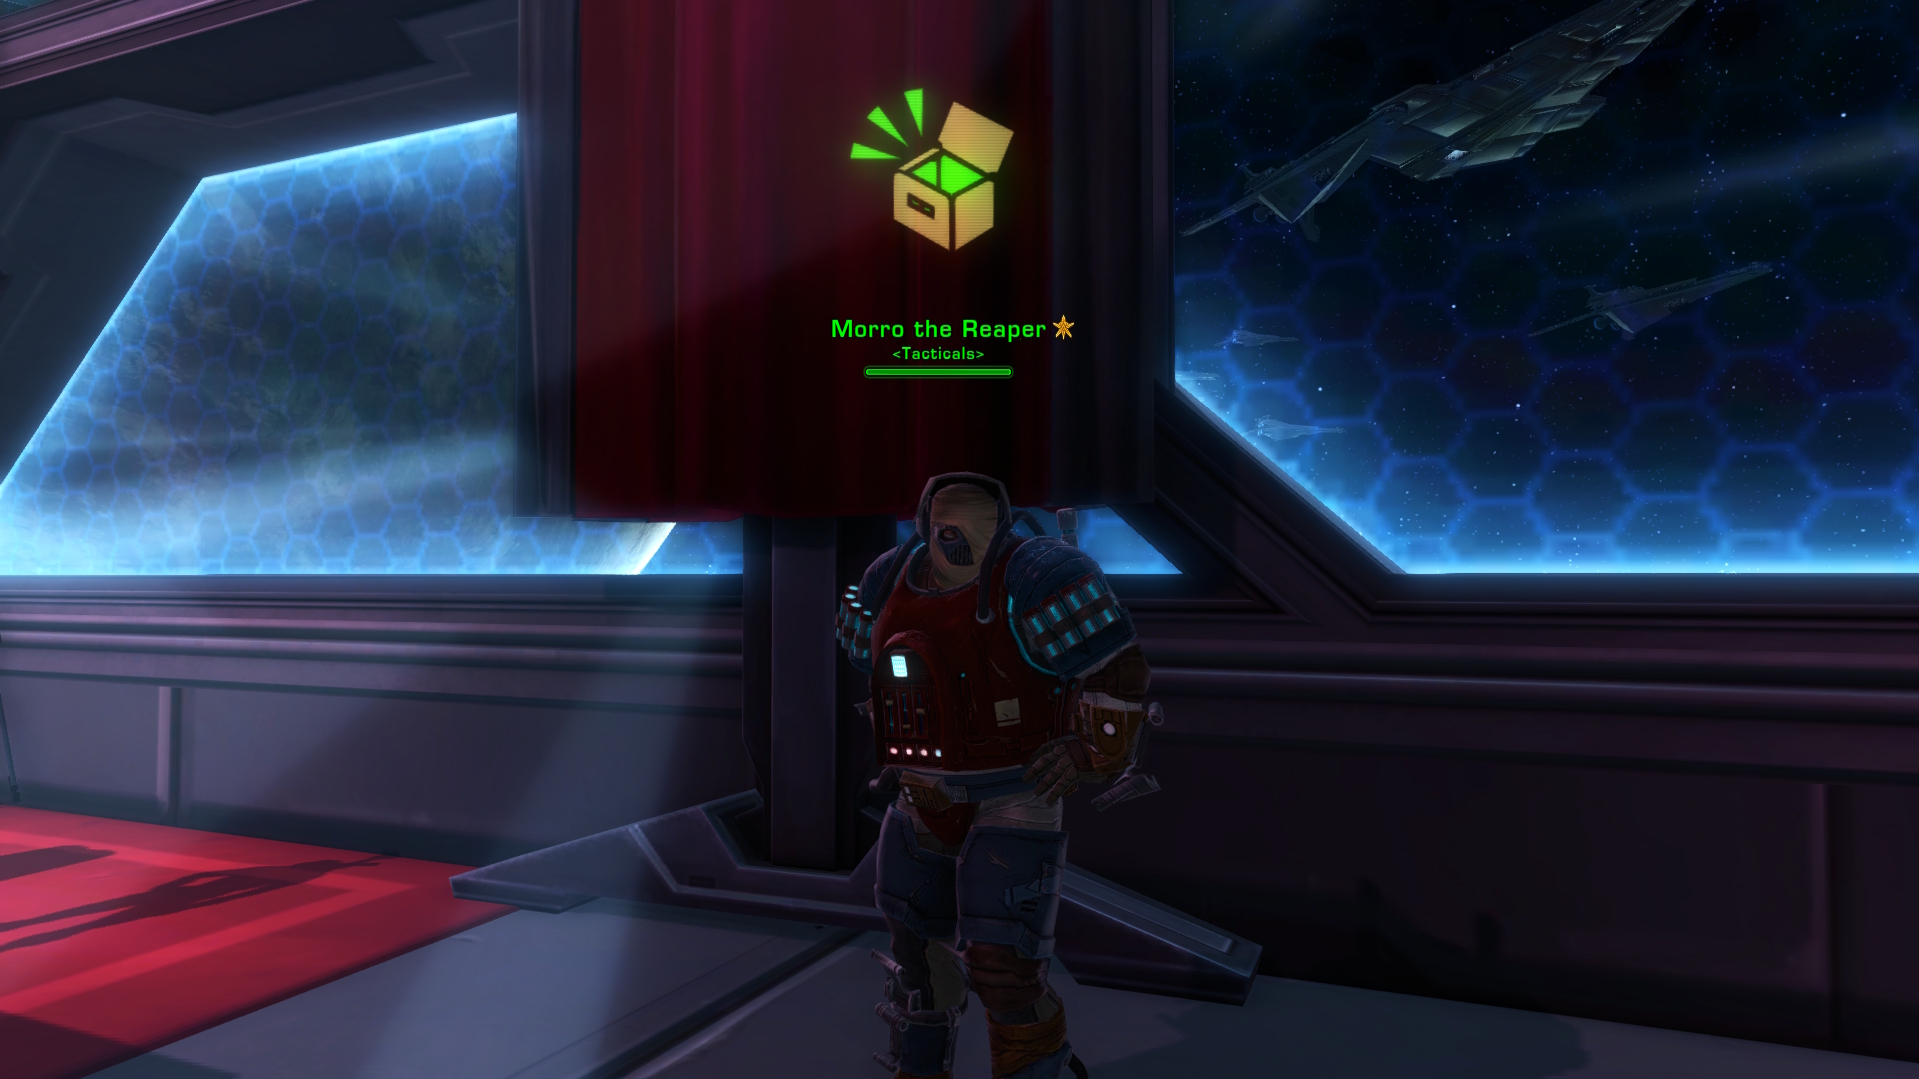
Tactical
Your Tactical is an item that provides unique bonus effects. They provide no boost to your stats per se, but are very powerful items that usually add bonus effects to certain abilities, improving certain aspects of your damage, healing or tanking.
For example, the Stormwatch tactical for the Lightning Sorcerer combat style applies a 15 second debuff called Stormwatch when you use Lightning Flash on an enemy. Whilst an enemy is affected by Stormwatch, they take extra damage from Affliction, Crushing Darkness or Thundering Blast.
Tacticals can be bought from the Tacticals vendor in the Supplies section of the Fleet. They cost 3,000 Tech Fragments and 1,000,000 credits each. Check our guide if you need to make more Tech Fragments or credits.
You can view the recommended Tactical for your combat style here.
Legendary Implants
Legendary Implants replace the old “Set Bonus” system in SWTOR.
Unlike Tacticals, they provide base stats such as Mastery, Power, Alacrity, Critical Rating and so on, as well as providing additional bonus effects. They are generally more multi-purpose than Tacticals and can often be used by multiple different roles/combat styles.
For example, the Berserker’s Package is a fairly generic Damage Dealer-oriented item that could suit multiple combat styles. It provides Mastery, Endurance, Power, and Critical Rating, and also increases damage dealt by 3% and damage taken by 6% (meaning your attacks hit harder, but in turn you take more damage from enemies).
Unlocking the Legendary Implant vendor
To unlock the Legendary Implant vendor, you need to complete the mission “Technological Advancements” from the Implant Researcher in the Supplies area of the Fleet. Hopefully you will have picked this up as mentioned at the start of the guide… 👀
By now, you should have played enough flashpoints to have fully charged the Neuro-Key.
Return to the Implant Researcher and give him the charged Neuro-Key to unlock access to the Implant Vendor.
Points to note on Legendary Implants
Although there is flexibility in some situations, for the most part, certain implants are objectively better to use than others. The recommended implants for your combat style can be found on the SWTOR Theorycrafters Discord server.
Each Legendary Implant costs 25,000 credits, 100 Conquest Commendations and 6,500 Tech Fragments to buy, and starts out at Item Rating 326.
You can upgrade the Legendary Implant 2 Item Ratings at a time (eg. 326 -> 328 -> 330) to a maximum of IR 340. This costs the same as buying a new Legendary Implant.
Farming so many tech fragments is one of the bigger grinds in the endgame, but don’t worry about it too much; the main boost comes from the bonus effects provided by the implant and not necessarily the stats.
Upgrading your Legendary Implants is something you can slowly chip away at over time.
The other good news is that once you upgrade two Legendary Implants to Item Rating 330, the cost to buy and upgrade implants is drastically reduced (more than halved) for all of your characters in future.
Step 4: Earpiece, Stims, Relics, and Finalising Stats
Nearly there!
Your earpiece and relics are the last two items left to upgrade. You can do this in much the same way as you upgraded your Prototype (blue) earpiece earlier in the guide, by buying the 324 rated item from the Flashpoint Gear Vendor and upgrading it with FP-1 Stabilisers. Occasionally you might get lucky and a higher-level earpiece or relic will drop from a boss.
Your aim at this stage
Following the guide below, upgrade your Earpiece and Relics to Item Rating 340, buy the appropriate stims for your role/combat style, and ensure your stats are correct for your role/combat style.
Earpiece
The earpiece you choose will depend on your role. I recommend Damage Dealers use an Accuracy earpiece, Healers use an Alacrity earpiece, and Tanks use a Shield earpiece, since these reflect your most important stat in each of those roles.
Stims
Stims are consumable items that increase your stats for a set period of time (8 hours). They are effectively a “credit sink” as you will need to buy more as you run out.
They aren’t prohibitively expensive though, and it’s important to note that the clock only ticks down whilst you’re logged in on that character.
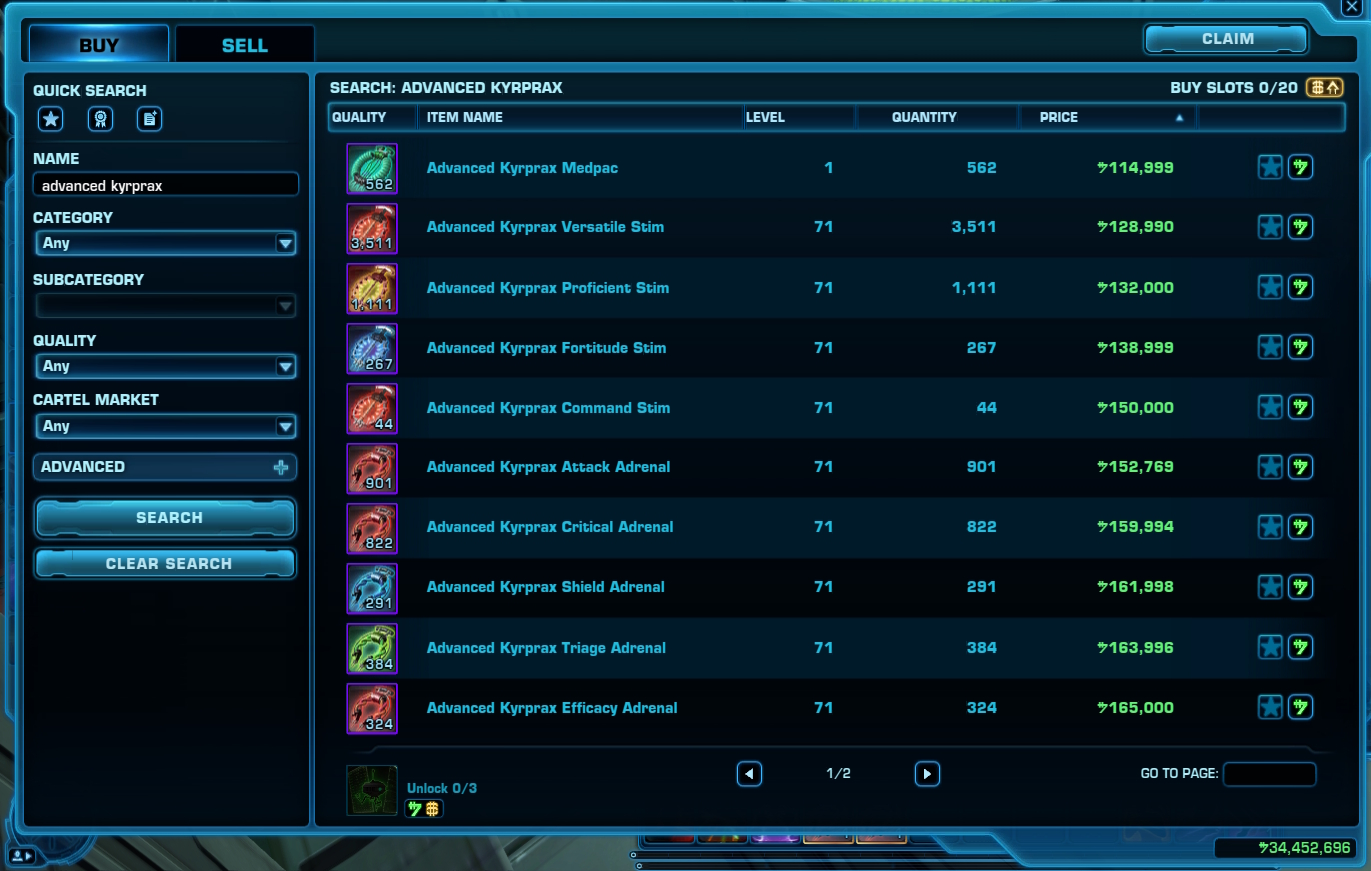
I recommend Damage Dealers use an Accuracy/Crit stim (Advanced Kyrprax Proficient Stim), Healers use a Mastery/Power stim (Advanced Kyrprax Versatile Stim), and Tanks use an Endurance/Defence Stim (Advanced Kyrprax Fortitude Stim).
As a side note, you can also purchase Advanced Kyrprax Medpacs, which are the endgame medpac. They’re designed for level 75 and so don’t provide a massive amount of healing but they can often still save you in a pinch.
Relics
Relics are much like Legendary Implants in that certain relics are objectively better for certain combat styles. Opinions vary so you should search for gearing guides for your combat style and make your own assessment of what relics to use, although the relics that provide passive bonuses are generally recommended over relics that you have to click to use.
Throughout this last part of the process you want to be paying more attention to your stats. As you level your earpiece, legendary implants, and relics, your stats will change, and you may need to adjust the Enhancements you’re using.
Beginner’s Guide to Stats
It’s important to remember that at this stage, you won’t be able to perfectly “min-max” your stats. It’s okay if you’re slightly over the recommended amount for a particular stat, but you should avoid going under the recommended amount, particularly for Accuracy, Alacrity and Shield.
Damage Dealers
Bosses have a 10% chance to dodge attacks, and so your first priority is to hit 110% Accuracy (100% + 10% to compensate for dodge chance).
Your second priority is to reach the right amount of Alacrity to hit 1.4 second ability cooldown (“GCD”). The exact amount of Alactiy needed varies; check your combat style on Theorycrafters.
Any remaining slots (eg. enhancements) that you don’t need for Accuracy or Alacrity should then be used for Critical Rating.
Healers
Heals always hit their target and so you don’t need any Accuracy.
Your first priority is to reach the right amount of Alacrity to hit 1.4 second ability cooldown (“GCD”).
Any remaining slots (eg. enhancements) that you don’t need for Alacrity should then be used for Critical Rating.
Tanks
You don’t need Accuracy or Alacrity, since your goal is to stay alive and not to deal large amounts of damage per se.
Your first priority is to reach the recommended amount of Shield. Check Theorycrafters.
Any remaining slots (eg. enhancements) that you don’t need for Shield should then be used for Absorption.
Step 4b (Optional): Augments
Augments are, as the name suggests, an additional increase to the stats of your gear. Most items of gear can be augmented, apart from your Tactical.
Each augment provides a relatively small increase to one stat, meaning they’re ideal for topping up the last little bit you need to hit a particular number.
To give an example, on my Lightning Sorcerer, my gear set with no augments puts me just under 110% accuracy.
I could swap out a Critical gear piece for an Accuracy piece, but this would put me way over 110%, and I would lose out on crit.
Instead, I use five Accuracy augments to top me up to 110%, and get to keep the Critical gear piece.
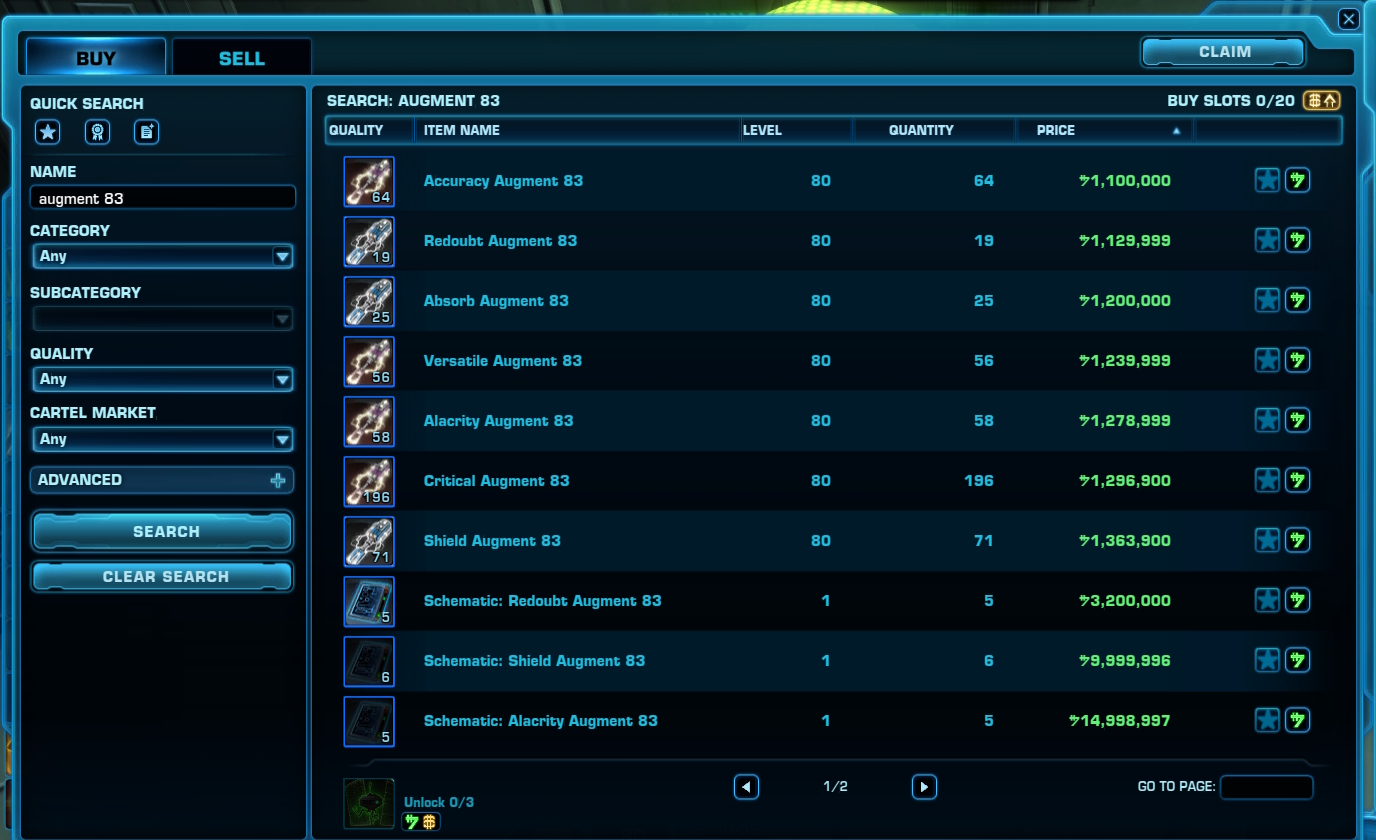
To add an augment to a piece of gear you’ll need to install an Augmentation Kit Mk-11 (currently selling for circa 200,000 credits on the GTN) and the augment itself. Fitting the Augmentation Kit will cost a small amount of credits too.
There are various levels of augment. Starting out, I would recommend the 83 series (eg. “Critical Augment 83”); these were released in one of the newer updates and have decent stats whilst still being relatively affordable compared to the highest tiers, which can sell for hundreds of millions of credits per augment.
If these credit amounts sound intimidating, don’t worry about it; augments are nice to have and allow you to get the absolute maximum performance out of your gear, but they’re not essential.
Very important note on augments!
Augments will be destroyed if you upgrade a piece of gear with an augment still fitted. Remember to remove augments from gear before upgrading!
Step 5: You can stop here (if you like)
Phew! You now have a full set of 340 gear. Time to relax.
…
Kind of.
The gear you have will be more than enough to enjoy most content in the game: provided you understand how to play your class you should be able to play Master Mode Flashpoints, Story and Veteran Mode Operations, etc. without issue.
That being said, you’re still a couple of item ratings below the highest level of gear: Artifact (purple) Rakata gear (Item Rating 344).
The good news is that if you’re happy with your performance and not interested or ready for Master Mode Operations yet, you can stop here.
On the other hand, if you want to maximise your performance and/or play the hardest content, such as Master Mode Operations, there’s still a little bit of work to be done.
Step 5+: Rakata Gear
Rakata is the highest tier of gear in the current version of SWTOR (7.x). It is the only tier of gear that can be upgraded to Item Rating 344
Similarly to Decurion gear (flashpoints), it can either be dropped by bosses (although only on Master Mode), or purchased and upgraded using a unique currency only received from Operations (OP-1 Catalysts).
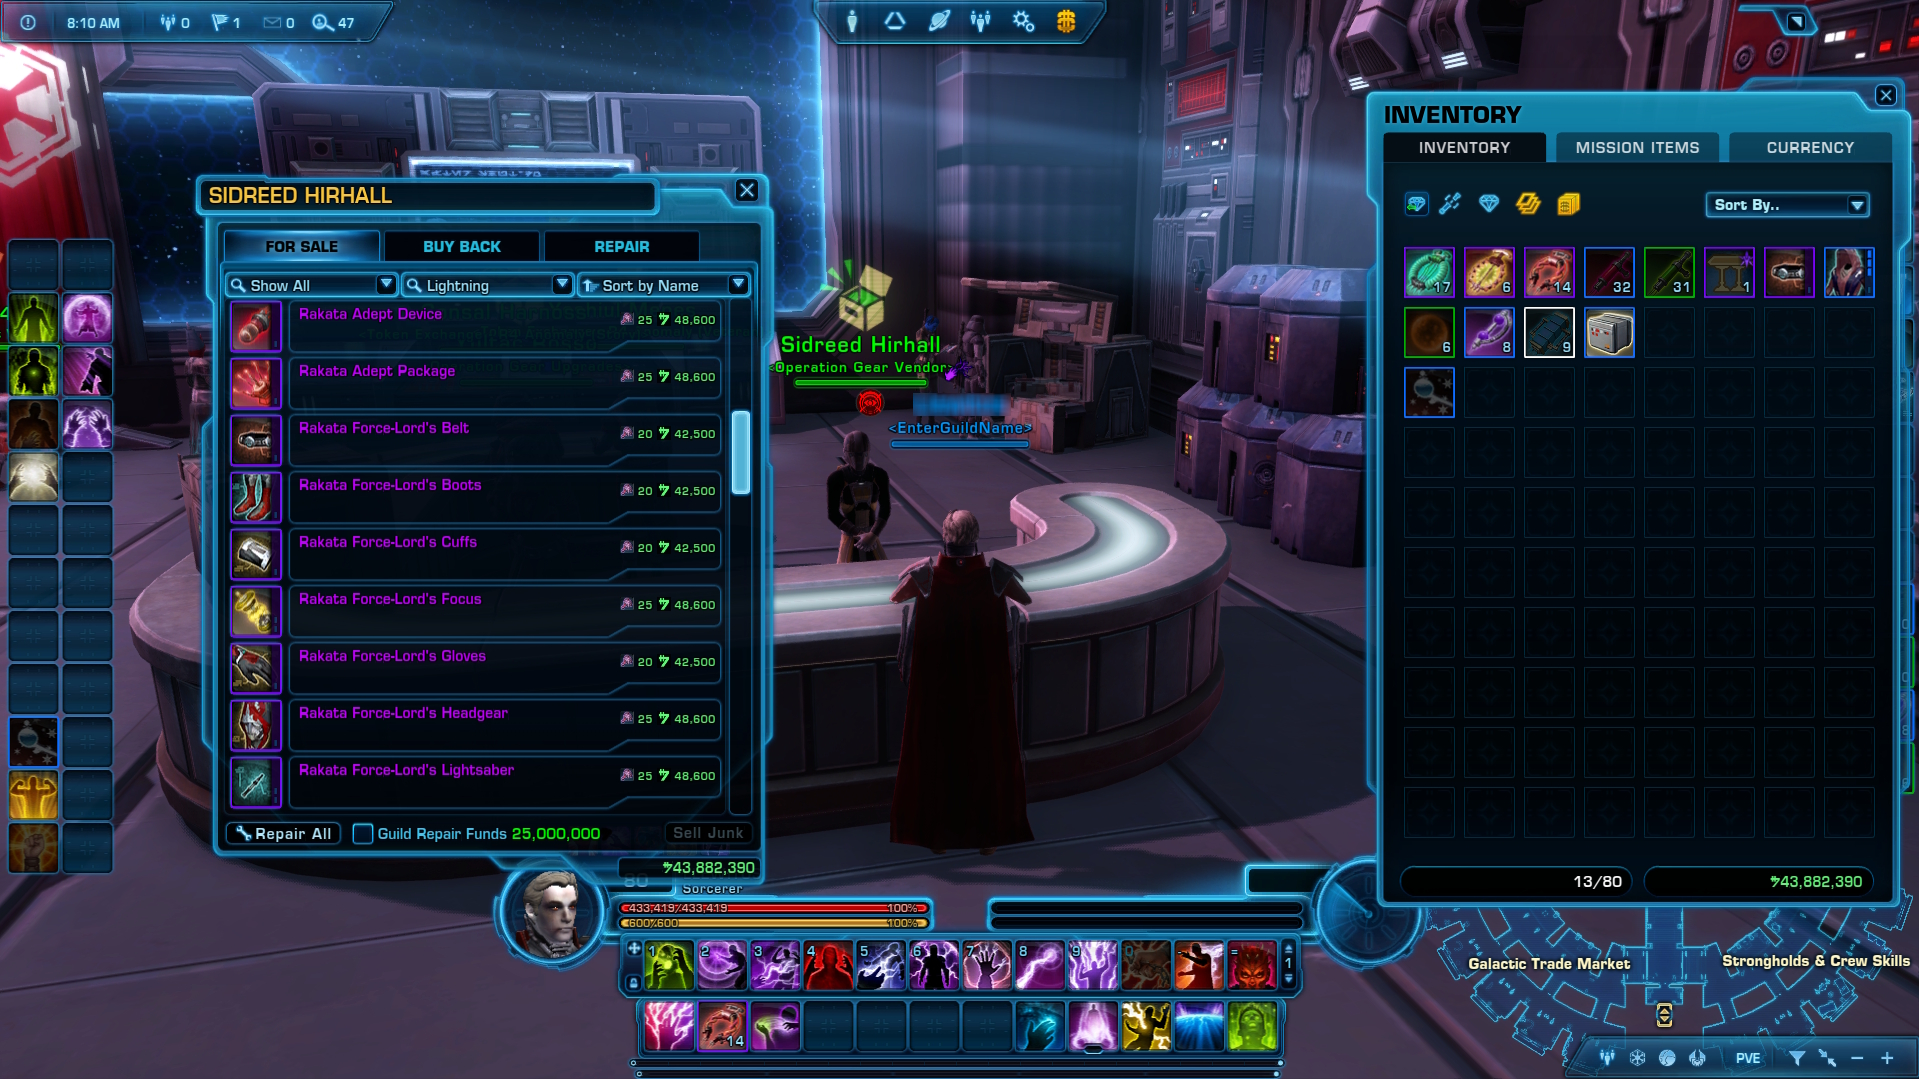
As with the other Level 80 gear types, Rakata is provided in full sets, such as the Force-Lord’s set. Just use whatever set shows up for you by default at the Operation Gear Vendor and/or drops from bosses.
Your stats might not be perfect as you transition from Hyde & Zeek to Rakata gear as the stats on individual slots may not match (eg. Hyde & Zeek blaster with Accuracy enhancement vs. Rakata blaster with Critical rating instead).
You can move enhancements around in your remaining Hyde & Zeek gear as needed, but again, don’t waste too much time min-maxing until you upgrade everything to 344.
There are two main methods of obtaining Rakata gear and most players use a mixture of both methods.
Nefra/Dash runs
Nefra and Dash are considered two of the easiest boss fights in the game as they have very few mechanics.
Nefra (Nefra, Who Bars The Way) is the first boss in the Dread Fortress operation. Dash (Dash’roode) is the first boss in the Scum and Villainy operation.
Players will often farm these two bosses repeatedly as they are guaranteed to drop an item of Rakata gear each time they are defeated in Master Mode.
The key limitation here is that you can only defeat each boss once per week (per character) in Master Mode, but you receive two pieces of gear for relatively little effort.
You will often see players recruiting for Nefra/Dash runs in fleet chat. You should check a couple of guides to familiarise yourself with how the fights work before joining.
Farming OP-1 Catalysts
OP-1 Catalysts can be obtained in any difficulty Operation, although the harder the difficulty, the more currency you receive for defeating bosses/completing the operation.
You can farm OP-1 Catalysts by completing Story or Veteran Mode Operations and use these to buy and/or upgrade Rakata gear pieces.
Step 5++: Min-Maxing
Now that you have full 344 Rakata gear you can reassess and ensure you’re at the recommended stats.
The Theorycrafters Discorder server has a spreadsheet describing the “Best in Slot” (BiS) items for each combat style. This is a definitive list of the absolute optimal gear to have in each slot, which augments to use and so on.